BMW N63 Valve Stem Seals
I remember back in the day, probably around 2008, when this guy came in with an E53 X5 with an N62 engine complaining about smoke from the tail pipe. We had never seen this before, so we checked the car the first time and couldn't find anything wrong with it so we let the car go. The guy came back a week later, insisting that his car was smoking from the tail pipe, and told us to let it idle for 15 minutes. We did that, and sure enough, there was smoke coming from the tail pipes. After checking a lot of stuff like crankcase vent valves and valve covers we figured out that the valve stem seals were leaking. After that, we started seeing a lot of these engines smoking from the exhaust at around 75,000 miles and up. Some were not too bad, and some looked like mosquito trucks.
After so many years of seeing these seals leak, the new N63 engine came out. BMW never addressed the issue with the N62, but we figured that for the new N63 engine there would be a design change to improve this flaw. Well guess what, the N63 uses the same damn part number for the valve stem seals in both engines and now the N63 is smoking too. When you have smoke from the tail pipe from worn valve stem seals, this means that you're burning the engine oil inside the combustion chamber. All engines consume some oil, but these burn a LOT of oil when they are smoking, and you end up topping off the engine oil frequently. BMW now states that it's normal for these turbo engines to consume about a liter of oil every 750 miles. In my opinion that's really high, but then again I'm not an engineer. I just haven't seen a properly running N63 burn that much oil. It also doesn't help that the turbos sometimes start to leak and can also cause a lot of oil burning, or make the situation worse combined with the valve stem seals. BMW finally caught on and decided to address the situation. They designed an improved valve stem seal, which is now green in color, instead of the old orange/red ones. Hopefully these will last longer. They also have a newer way to replace the seals without having to remove the engine or the cylinder heads from the vehicle. I got one of these smoking N63 engines a few months ago, so I decided to take some pictures to share the repair here.
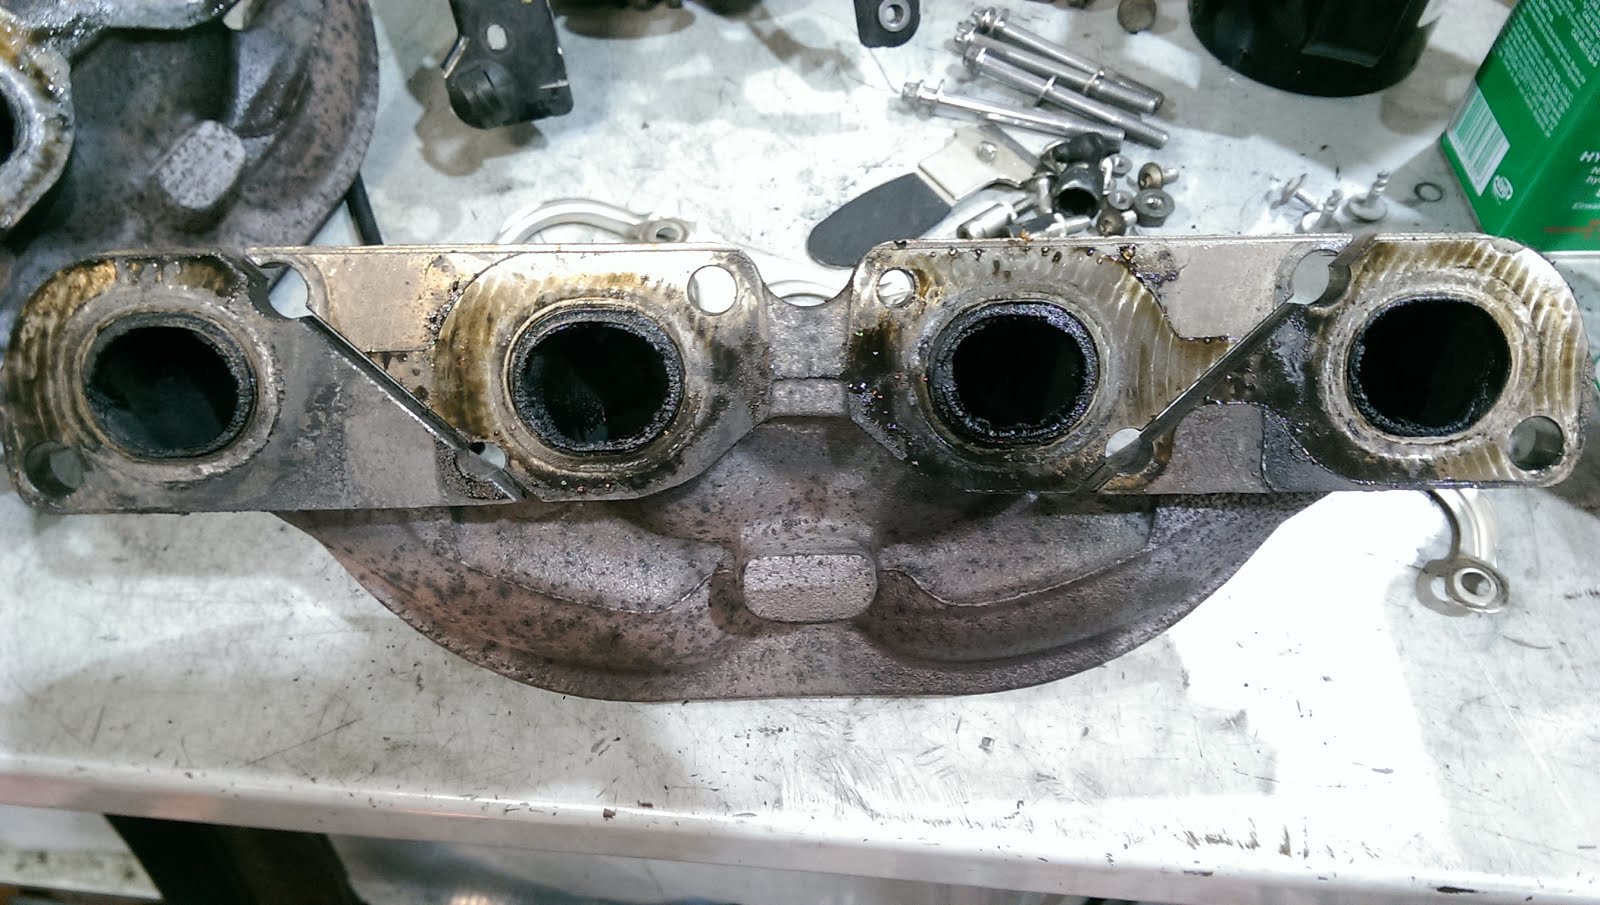
I had to check to make sure that the seals were really leaking, so I removed the turbos and the exhaust manifolds to inspect the valves.


- N63 with turbos and exhaust manifolds removed
This is what I found:


On the left picture you can see the oil had passed through the seals and had entered the intake port. The right picture is of the intake manifold. The oil had been collecting there and also on the intake valves and ports of the cylinder head. After this was confirmed I proceeded with the repair.
On the newer F series platform (F01, F02, F10, F06, F07) the engine is usually not removed from the top. It is lowered, with the transmission and front sub frame on a hydraulic table. The drive shaft, power steering, coolant hoses, fuel lines, etc. are disconnected from the engine and transmission. Then the table is placed under the car and is jacked up. The sub frame and transmission bolts are removed and the complete engine, trans and front sub frame are lowered from the chassis.The vehicle stays up on the lift.

- N63 engine on hydraulic table
After this, the real fun begins. There is a newer way to do this job, which consists of taking the camshafts off and replacing the valve stem seals with the engine and cylinder heads in the car, but when I did this one, the tools to do it this way did not exist, and I had to do it the old way, which is to remove the cylinder heads and place them on a special jig, and then remove the camshafts, lifters, valve springs and finally replace the damn valve stem seals. It sounds like a lot of work because IT IS a lot of work.


On the top picture, we have the bank 2 cylinder head with cover, injectors and high pressure pump. on the bottom picture, the same cylinder head with the valve cover off. Camshafts and vanos units are still installed.


Same cylinder head on the top picture with vanos and camshafts removed. Bottom picture shows part of the engine block after removing the bank 2 cylinder head.


- Close-up picture of one of the cylinders and piston.
After the cylinder head is removed, I also removed the fuel injectors so I could place it on the cylinder head jig to remove the valve springs and seals.

Once the cylinder head is mounted here, the valves are held in place from underneath so the valve spring can be pushed down, and the keepers can be removed. Then the spring can come out to access the valve stem seal.

The spring is compressed by the special tool, exposing the keepers for removal.

This is a picture of the original (red) valve stem seal.

This is a picture of the improved (green) valve stem seal.

Comparison of the old vs new seal. You can clearly tell the old one on top is wider and bowed out compared to the new one on the bottom.

Old seal on left vs new seal on right installed on valve.
After all the dis assembly, I finally get to the valve stem seals. You can see the old one (reddish color) is mushroomed out, causing it to leak and let the oil go through. The new (green) seal fits much tighter around the valve stem, creating a better seal.
Also, since the seals had been leaking for a while, the intake ports and valves were full of carbon so I took the opportunity to clean these to increase airflow.


Valve springs on the back of the pictures. The valves on the left side of the picture are the ones I had already cleaned, compared to the dirty ones on the right.
After cleaning all the valves and ports and replacing the valve stem seals I re assembled the engine and reinstalled it in the car. It ran great after the repairs.
thanks for the write-up.
ReplyDeleteIs it possible to get pics and videos up again?
Please make the pics work, this is a very interesting post :)
ReplyDeleteNice job
ReplyDeleteNice job
ReplyDeleteReally you blog have very interesting and very valuable information about the BMW mechanic well done,
ReplyDeleteBMW mechanic
PART NUMBER OF NEW UPDATED SEALS?
ReplyDelete